
Create a Google Ads account
This tutorial walks you through opening your Google Ads account screen by screen, without launching a campaign before you're ready. Set aside about ten minutes and have a Google Account, your website address and a payment method handy.
Before you start
- A Google Account with an email address you check every day. You don't need a Gmail address: your work email is fine.
- Your website address.
- Your billing country, currency and time zone, decided ahead of time. The currency and time zone will be permanent.
- Your business name and address exactly as they appear on your official documents, plus your tax details if you bill as a business.
- A credit or debit card, or your bank details for a direct debit if it's offered in your country.
Step 1 : Sign in with your Google Account
Open the Google Ads sign-up page with the button below. If you aren't signed in already, Google asks you to sign in to your Google Account.
Don't have one? Click “Create account” to make one. You don't need a Gmail address: you can use your work email.
Heads up: Use an email address someone checks every day. Google will send requests with deadlines there, such as advertiser verification (step 8).
Open Google Ads sign-upStep 2 : Enter your business name and website
To get started, Google asks for your business name and your website address. It uses them to prefill the next steps.
Google also offers to link your YouTube channel or your Google Business Profile. This is optional. If you have a Business Profile, link it: it supplies the address and phone number shown under your ads.
Step 3 : Skip the campaign setup
Next, Google asks a series of questions to build a campaign: your goal, then your budget.
You don't have to answer them now. Google itself recommends creating your account first and skipping all the campaign suggestions. Look for the option to create an account without a campaign.
As long as no campaign is active, you won't be billed for any ads.
Heads up: A campaign created at this point starts out with default settings: a budget and targeting you didn't really choose. It starts spending while you're still finding your way around.
Read Google's recommendation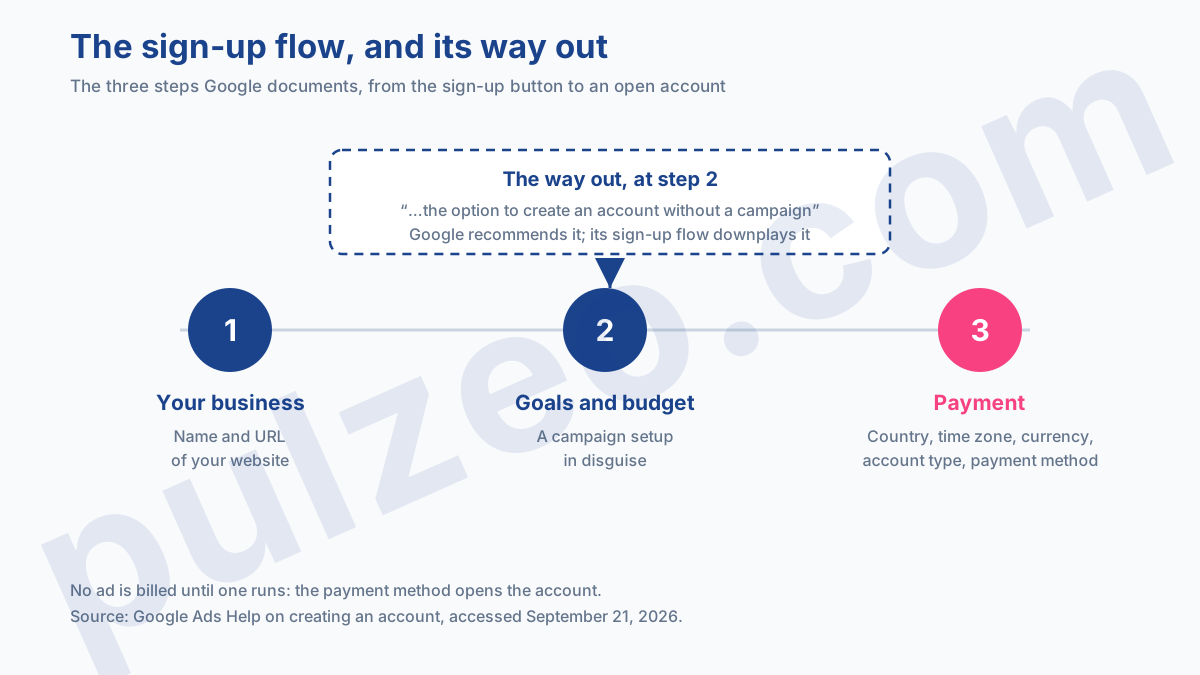
Step 4 : Check your country, time zone and currency
You're now on the billing page. Choose the country of your billing address: it determines which payment methods and currencies are available.
Check the time zone. It sets your account's day: what time your daily budget resets, and which day an 11:40 p.m. sale is counted on. Your reports and billing depend on it.
Check the currency: it's the one Google will bill you in.
Heads up: The currency and time zone are permanent: Google doesn't let you change them once the account exists. To switch, you'd have to open another account. You can copy your campaigns into it, but their history stays in the old one.
Currency and time zone: Google's help page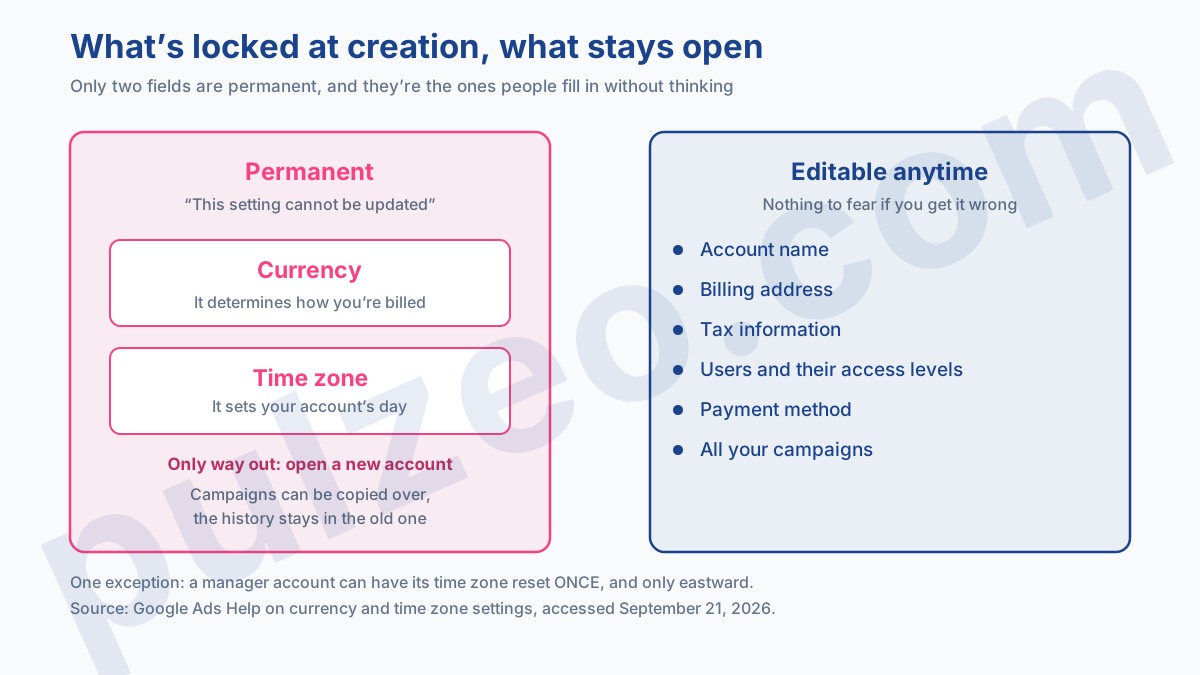
Step 5 : Create your payments profile
On the same page, Google asks who pays and how: that's your payments profile. Start with the account type.
“Organization” (the default) is for a registered business, including a sole proprietor operating under a registered trade name. “Individual” is for personal advertising, or for a freelancer who isn't registered as a business.
Enter the billing name and address exactly as they appear on your official documents. Then add a credit or debit card, or a direct debit from your bank account if your country offers it.
If you have a promo code, enter it in the “Introductory offer” field. Then click “Submit” to finish.
Your ads are only billed once they run. You might see a temporary authorization on your card, which is typically removed within a week. Google may also ask for a small verification prepayment, which goes toward your future ad costs and is fully refundable.
Heads up: You can change the account type only once, and doing so means going through advertiser verification again. Choose carefully.
Step 6 : Switch to Expert Mode
Your account is now open. If it shows up in Smart Mode, a simplified version of Google Ads, switch to Expert Mode before you create your first campaign.
Smart Mode only creates Smart campaigns: Google picks your keywords from themes, sets your bids for you (the most you're willing to pay per click), and shows a simplified dashboard instead of detailed reports.
To leave it, click “Switch to Expert Mode” in the account settings menu.
Heads up: Google doesn't document any way to turn a Smart campaign into a standard one. If you create one before switching modes, you'll have to rebuild it, without its history.
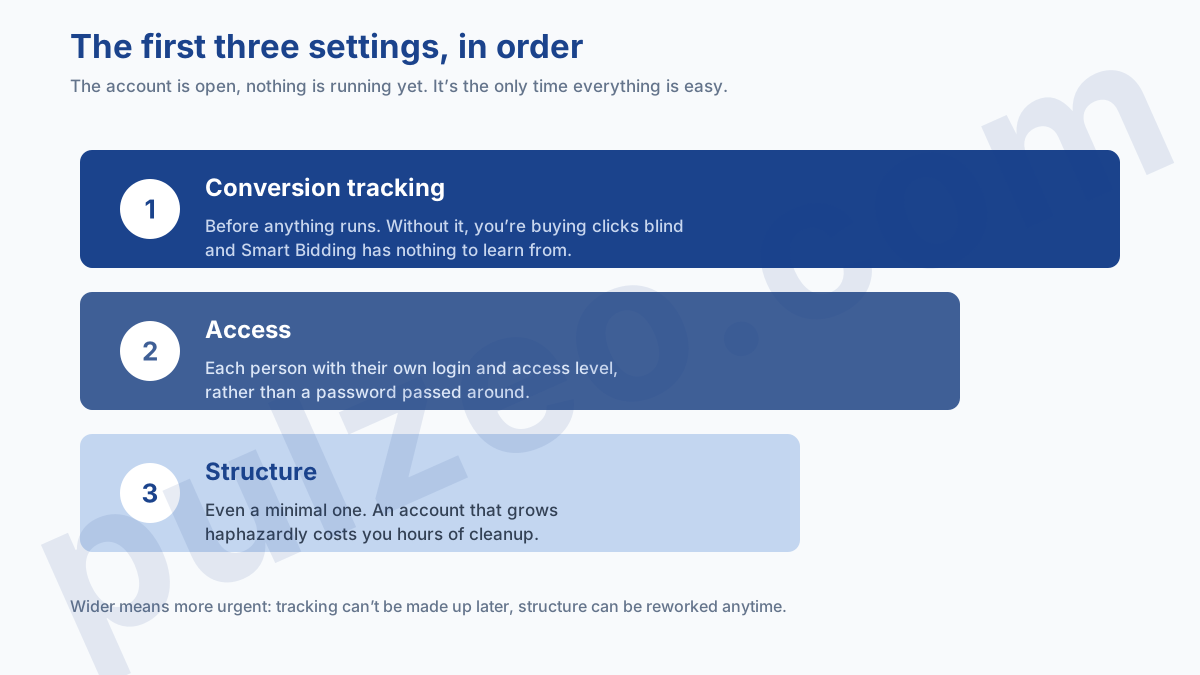
Step 7 : Set up conversion tracking
A conversion is the action you want a visitor to take after clicking your ad: a quote request, a phone call, a purchase. Conversion tracking counts them for you.
Without it, you'll know how much you spend, but never what it brings in. And Google requires at least one conversion goal to create a Search campaign, meaning ads shown in Google search results.
If you didn't set it up at the end of sign-up, go to “Summary” in the “Goals” menu, click “+ Create conversion action” and follow the steps.
Heads up: Don't check just any action to unlock campaign creation. Google's automated bidding learns from these conversions: if they don't measure anything real, your campaign optimizes toward nothing for weeks.
Step 8 : Complete advertiser verification
A few days or weeks after you open the account, Google may ask you to confirm your identity: that's advertiser verification. All advertisers will eventually have to complete it.
The request comes as a notification in your account or by email, with a deadline. You'll find your tasks under Admin > Policy > Account.
Start right away: Google's review can take up to five business days. You can even complete verification before Google asks.
Heads up: The deadline can't be extended. If it passes, Google pauses your account and your ads stop running until you're verified. Some ads may already be restricted as soon as your account is selected.
Set up your first campaign
Choose a Search campaign. It's the only type where you pick your keywords one by one, which makes it the right place to learn.
Take your time with that choice: once a campaign is created, its type can't be changed.
For the objective, “Create a campaign without a goal's guidance” keeps Google from prefilling settings for you. Google will still ask for a conversion goal: that's step 7.
The budget comes last. To have enough to judge the results, plan on about 30 times your cost per acquisition each month (what you spend on ads to win one customer or lead): around $750 for a $25 cost.
Almost everything else can be changed after launch: budget, bids, locations, keywords, ads. Give it a few weeks before you judge, and make changes once a week rather than every morning.
Read the full guide to your first campaignConnect your account to Pulzeo
Once your campaign is running, Pulzeo reads your Google Ads data and shows you what's working, what costs too much and what to fix.
Connecting goes through Google and takes less than a minute: pick the Google login that has access to your Google Ads account. Pulzeo never changes anything in your account without your go-ahead.
Common questions
Is it free to create a Google Ads account?
Yes. Opening an account is free, with no commitment. Google asks for a payment method when you sign up, but your ads are only billed once they run.
Can you create a Google Ads account without a campaign?
Yes, and Google recommends it: create the account first and skip the campaign suggestions (step 3). You can build your campaign later, once you know what you want to pay for.
Can you change the currency of a Google Ads account?
No, and the same goes for the time zone: both are set for good when the account is created. The only fix is to open another account with the right settings. You can copy your campaigns into it, but their history stays in the old one.
How long does it take to create a Google Ads account?
About ten minutes to open it. If Google then asks for advertiser verification, allow up to five business days for the review.
Do you need a manager account to get started?
Not for your own business's account: a regular account is enough, and you can invite other people to it, each with their own access. A manager account is for running several accounts, for example as an agency or a freelancer with multiple clients.